To Create a New Project
Go to PMO > Projects List - click + New

You will need to complete some basic information within 5 sections:
Details
Preferences
Advanced Setup
Accounting
Form (Custom Fields)
Details
Everything in this section is mandatory, except the description:
Alias (Only required if 'Automatic Alias' is switched off via Admin > Configuration > Company Preferences)
Project Name (Note: Can not be the same as an existing Project)
Start Date / End Date
Calendar (Options in drop down are configured via Admin > Calendars)
Project Manager (Once the Project has been created they will receive an email notification to let them know they have been assigned to a Project)
Description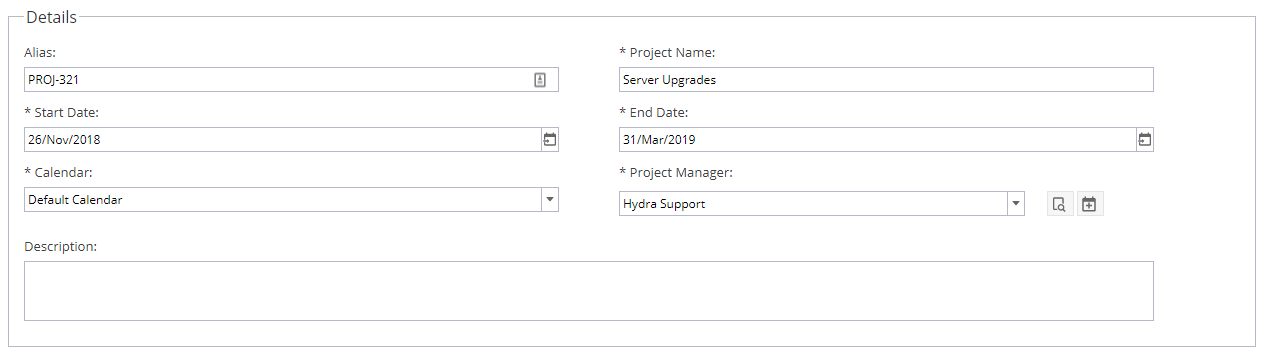
For Project Managers you can start typing a name or search for a user using the magnifying glass icon  which will give you some filter options:
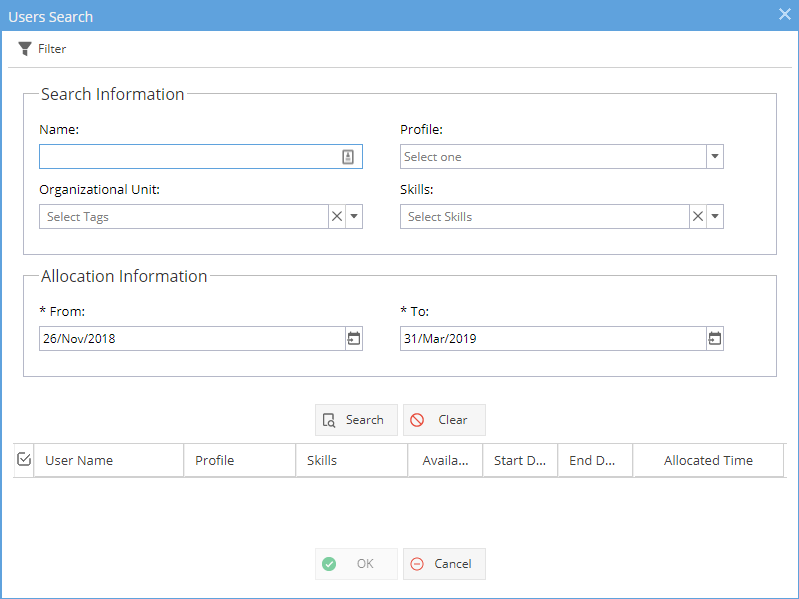
Or you can configure the Allocation by using the  icon:
icon: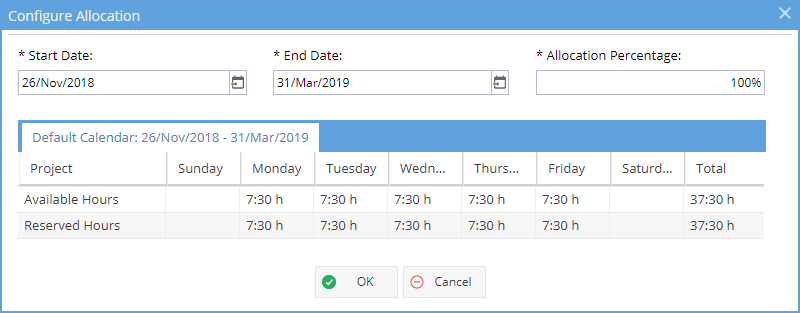
Preferences
Time Logs are to allow Team Members of the Project to log time on a timesheet, this will give you data for the Timesheet Reports.
Tracking Mode is to show progress by percentage or time remaining, this will automatically switch to Time Remaining if Time Logs are set to Yes.
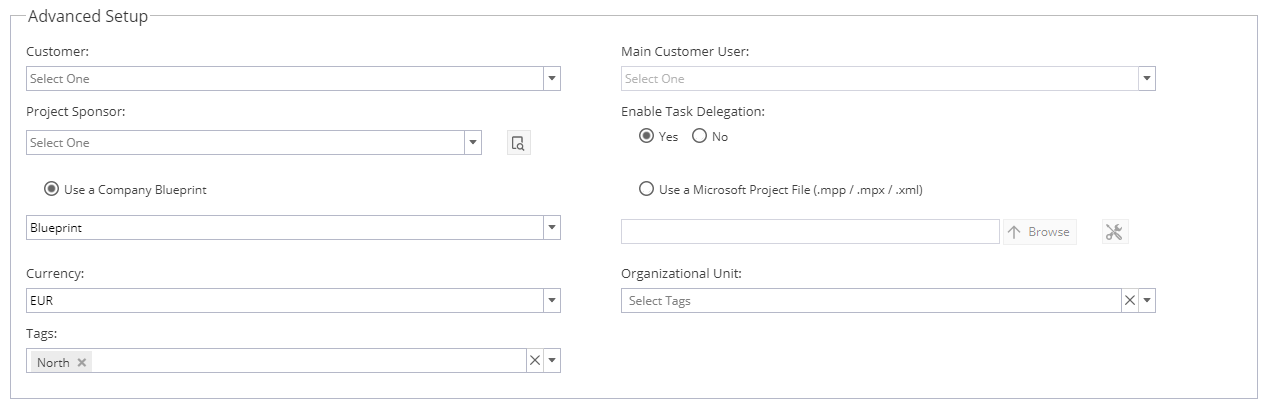
Advanced Setup
Customer (Drop down list taken from Active Customers shown under Operations > Customers)
Main Customer User (Drop down list of Associated Users based on Customer selected)
Project Sponsor (Search to select any Active User, Internal or External)
Enable Task Delegation (Note: Delegation is not compatible with Tasks using Dynamic Assignment)
Use a Company Blueprint(*If a Project is created without a Company Blueprint at this stage you will not be able to add it in later, you would need to delete the Project and start again)
Currency - This option will only appear if you select a blueprint from the dropdown list which is configured with more than one currency to choose from.
Use a Microsoft Project File (Select a file to upload from one of the supported types shown)
Tags (*If configured under Admin > Configuration > Company Preferences > Tags Management)
Organizational Unit (*If configured under Admin > Configuration > Organizational Units)
For Project Sponsors you can start typing a name or search for a user using the magnifying glass icon which will allow you to search by Name or Profile: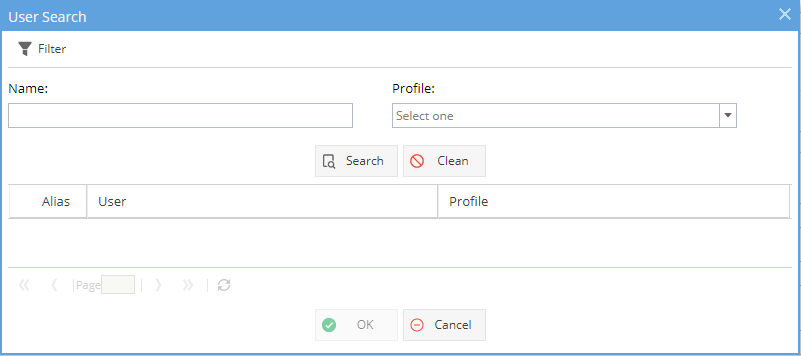
The Tools Icon on the right hand side of the Microsoft Project File allows you to set these options for uploading: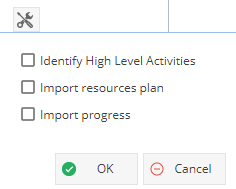
![]() Note: Tasks imported from MS Project will be set with Dynamic Assignment as the Scheduling Mode.
Note: Tasks imported from MS Project will be set with Dynamic Assignment as the Scheduling Mode.
Accounting
The Initial Budgeted Cost and Initial Expected Revenue are not required fields.
If used they will be visible via Project > Finances > Budget
There is also a Reporting Widget called "General Project Info" can be configured to include Cost/Revenue.
Revenue Tracking has 2 options:
- Time & Materials
- Fixed Revenue
The most common place for updating the Time & Materials is Project > Finances > Resources Sheet
Form
This area is for additional information held in Custom Fields for your company.
Custom Fields can be set under Admin > Configuration > Company Preferences > Project Custom Fields