You will need to have access to the Project > Project Home > Timesheets
Initially all rows will appear greyed out but totals for any existing time logs will show for each date:
Find a Task
Find the Resource Name in the list
Click on the arrow on the left of their name
Find the Task name in the list and then Double click in the box for the corresponding date
You can enter time against any day up to the current date, future dates will show greyed out.
Optional: Click on the speech bubble icon ![]() to enter a description or internal comments
to enter a description or internal comments
Click OK
When entering time you may see a drop down arrow instead, this means you have to select a time type.
The options available are specific to your company but usually apply when different costs / rates need to be applied (e.g. Overtime or Non Billable ).
Click on the box for the day in the row you need to log time against, a drop down box will display.
Double click in the hours box next to the time type(s) to enter time to reflect the time spent working on a Task.
You can enter time against any day up to the current date, future dates will show greyed out. 
Optional: Double Click in the description or internal comments box to add a note (This will only be editable if hours have been entered first)
Click on Close
Create an Unscheduled Event
Find the Resource Name in the list
Click on the green plus icon to the right
Click on the drop down list for Unscheduled Events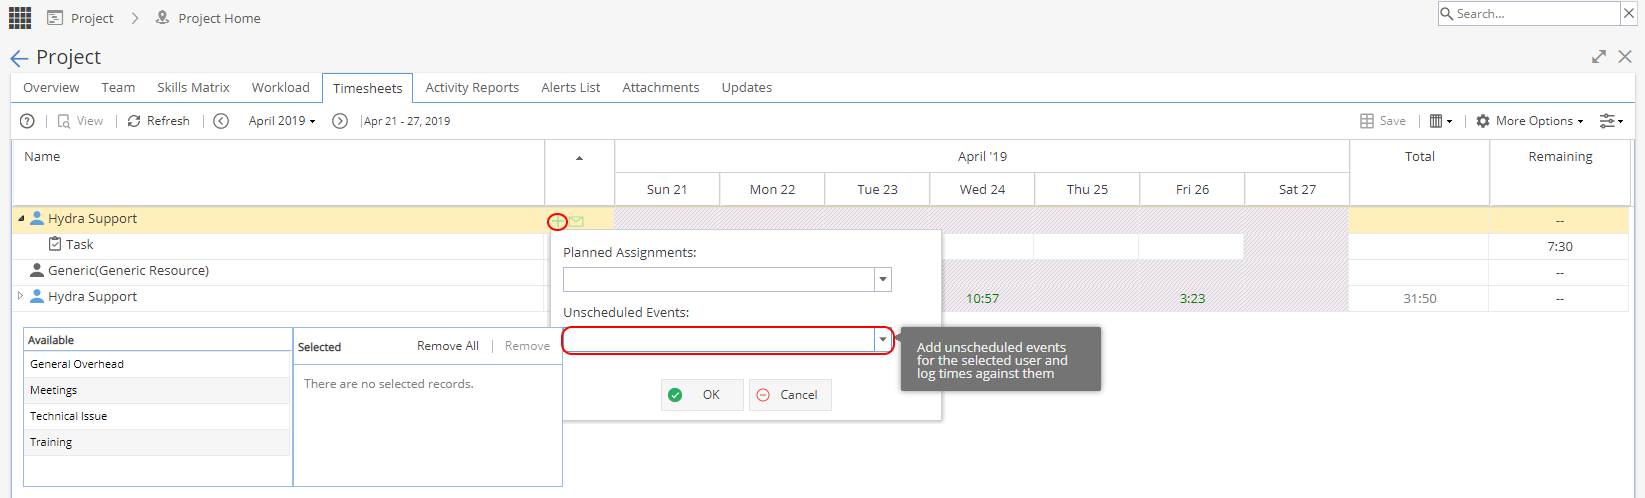
Two panels will show for Available and Selected.
(The list of Available is from Project > Admin > Preferences > Unscheduled Events)
Double click on any Unscheduled Events from the Available list.
When you have one or more shown in the Selected Panel, click OK.
The Resource will now be expanded to show all Tasks and Unscheduled Events added will appear at the bottom of the list. Time can now be added the same way as for Tasks.