Step 1 - Create the type of Expense
Note: If this is to be used frequently - add it to the Blueprint following the steps below via the Template Project
To add to a single project go to Project > Finances > Resources Sheet
Click on + New
Click on Expenses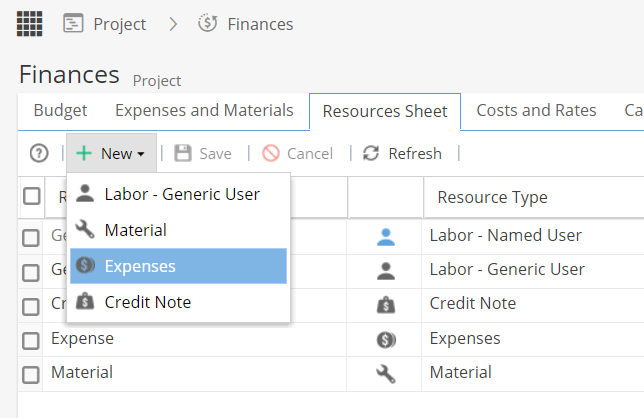
A new row will show in the Resources sheet where you can edit the name and / or select a budget category:
Step 2a - Link an expense to the Project
Go to Project > Finances > Expenses and Materials
Click on + Add Expenses and Materials
Check the tick box on the left to add an Expense
Click OK
The Name and Category (Budget Category) remain the same as shown on the Resources Sheet.
Double click in the cell to add a Description.
Estimated / Actual Quantities are for Materials so will show with a Dash.
Estimated Value / Actual Value can be added.
Actual Date is a required field when an Actual Value has been added.
Task Name / Task Cost Model would be shown here for reference if an expense was added to a Task (See below)
The Cost / Revenue options show how the estimated / actual values impact your costs / rates for the project, for expenses the default option of Cost will be selected.
Step 2b - Link an expense to a specific Task
Go to Project > Tasks > Task Details > Overview
Click on + Add Expenses and Materials
Check the tick box on the left to add an Expense
Click OK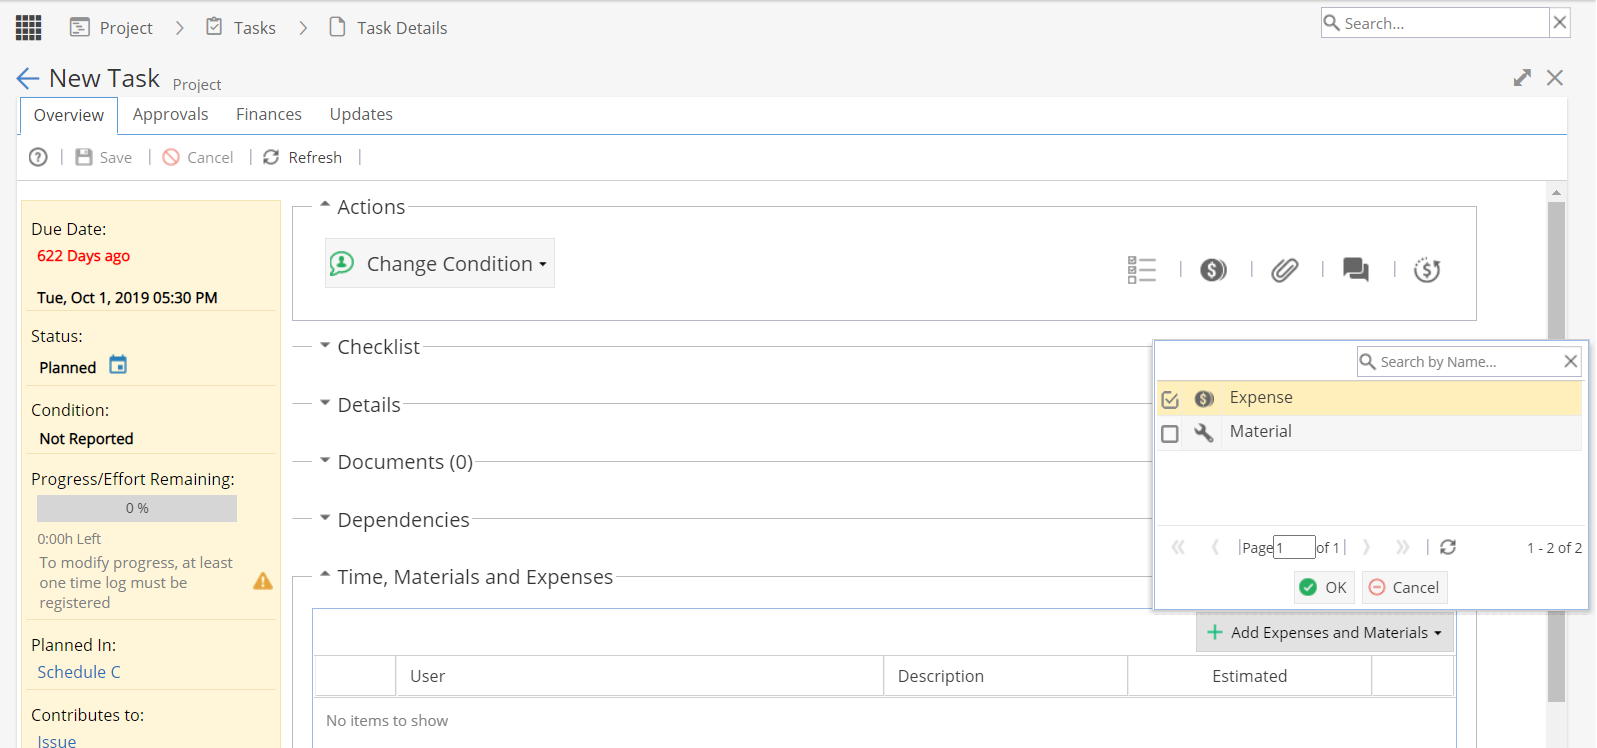
The Name remains the same as shown on the Resources Sheet.
Double click in the cell to add a Description.
An Estimated Value can be added.
The Actual Value field will only be available AFTER the Task has been Started.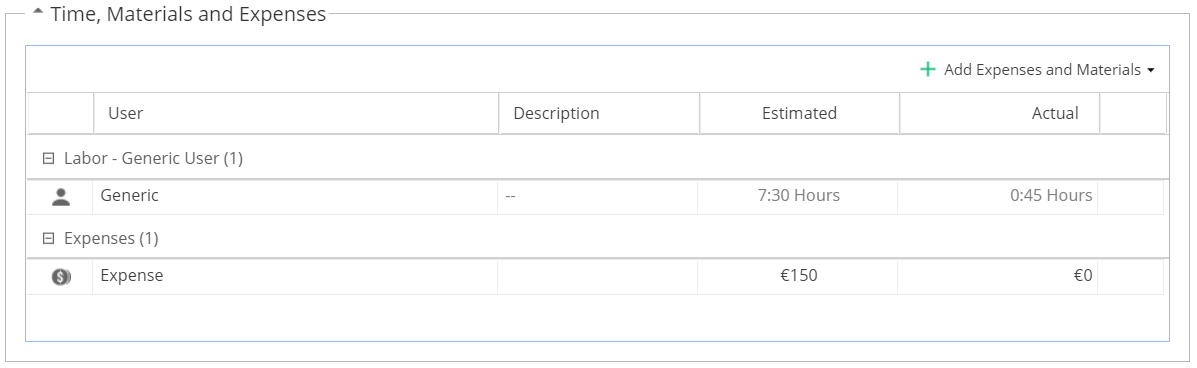
Expenses added to a Task will be visible via Project > Finances > Expenses and Materials