Schedule Overview
The Overview tab provides information regarding the status of the Schedule and is broken down into several sections:
Yellow Information Panel
Actions
Form
Details
Costs and Rates
Budget Category
Yellow Information Panel
The current Status, Progress, and Start / End Dates can be seen within the yellow box to the left.

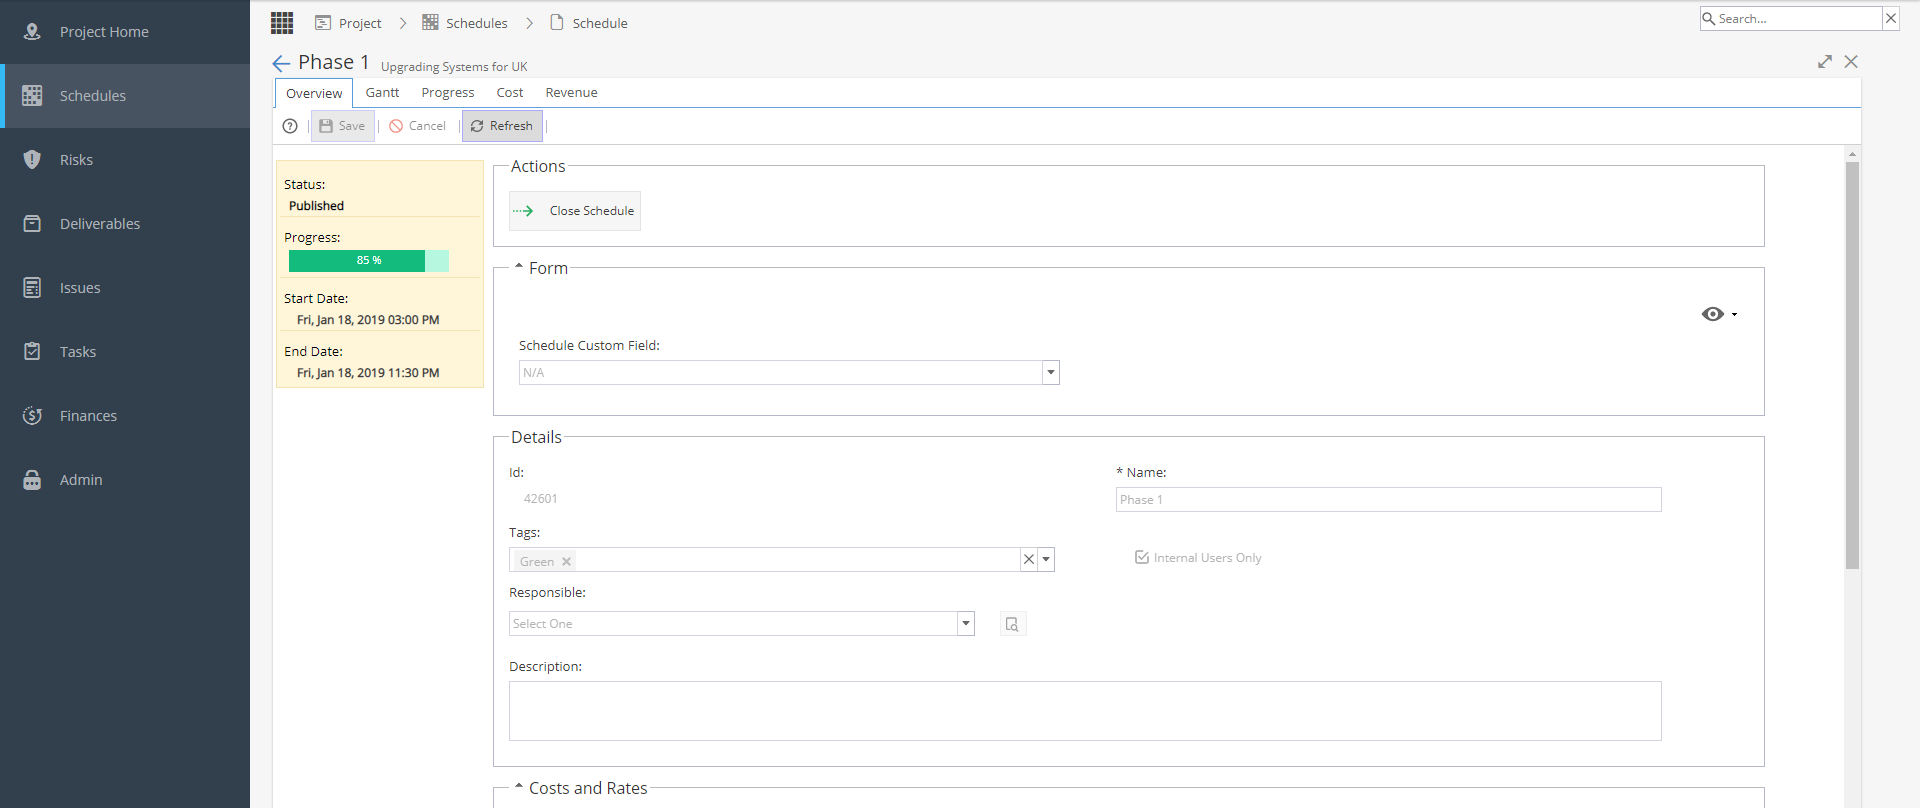
Actions
The Actions area will allow you to Publish / Open / Close the Schedule:
Form
This section will only be visible if Schedule Custom Fields are being used.
This is seen under Project > Admin > Preferences > Schedule Custom Fields
The eye icon allows you to show / hide custom fields:
Details
ID - ID # given by the system when created.
Name - The name of the Schedule
Tags - Tag options are depending on options set under Project > Admin > Preferences > Tags Management
Internal Users Only - A check box to restrict access to the Schedule to internal users
Responsible - This option will only appear if Schedule Grouping is set to Yes (either at Company or Project Level)
Description - A text box to add more information about this Schedule

Costs and Rates
The Costs and Rates area allows you to choose the default way costs and rates are calculated by the system:

Determine by Resource -
Values are calculated based on the cost of the resource as defined in Project > Finances >Resources Sheet.
Determine by Resource Profiles -
Values are calculated based on the profile of the assigned resources.
These are defined in the Project > Finances >Costs and Rates tab.
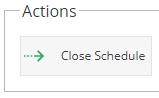
Override profile time types -
When selected, a table shows which allows manual entry of the costs and rates for each profile for this schedule:
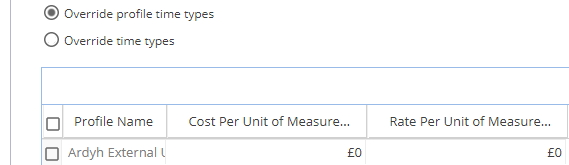
Override time types -
When selected, a table shows that allows you to override each time type with new costs and rates:
Budget Category
The Budget Category area allows you to set all tasks to a specific budget category. To do so, select the "Set all tasks to Budget Category" radio button and select the Budget Category from the drop down list on the right. You can set all tasks back to default by selecting "No override".
