Capacity Planning is a new feature in Hydra.
Access to this menu is based on your Resource > Profile settings.
The Capacity page will look like this if no models have been created yet: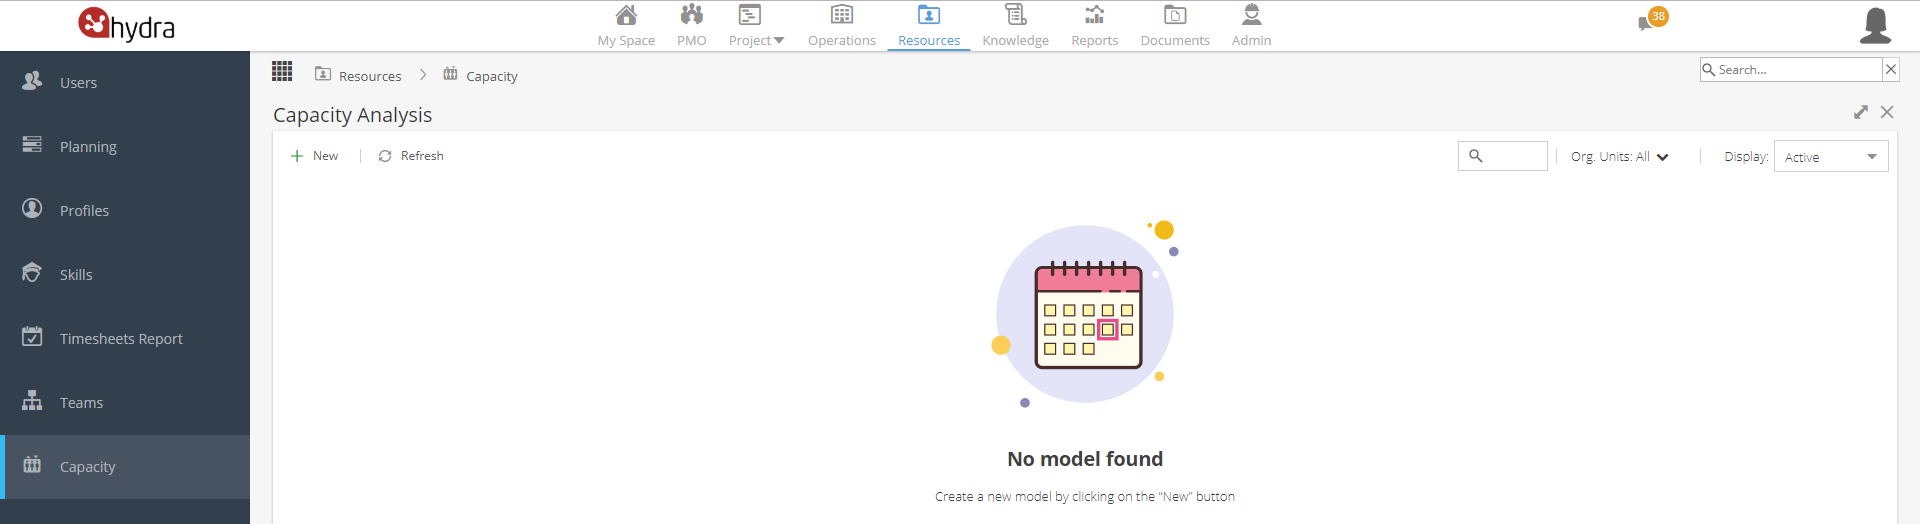
Click on the + New button on the top left to create a model.
Add a Name. Select a Start Date and then select the number of years.
*The filter for Project Org Unit will only be visible if your company are using Org Units
The screen will then update to show Live Projects which fall in this time frame: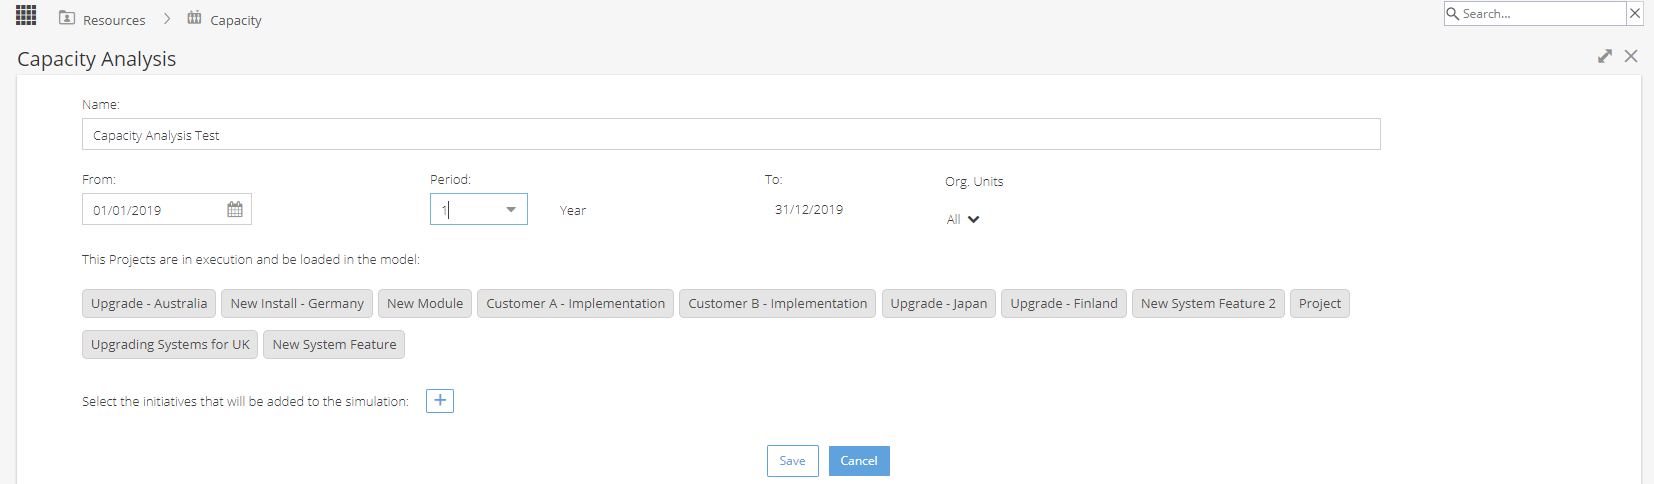
To include Draft Projects in your model, click the + icon to select the initiatives to add to the simulation.
When looking for Draft Projects you can use the magnifying glass to Search.
Or use the Add Filters option to limit the search by Alias, Company Tags or Project Custom Fields etc.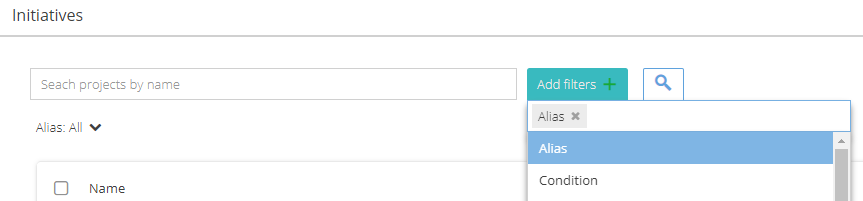
To remove a Filter, click on the Add Filters button and click the X next to the Filter you want to remove.
Use the tick boxes on the left to add any Draft Projects you would like to include and then click "Add to model"
Once you are happy with the list of Projects for your model, click on the Save button.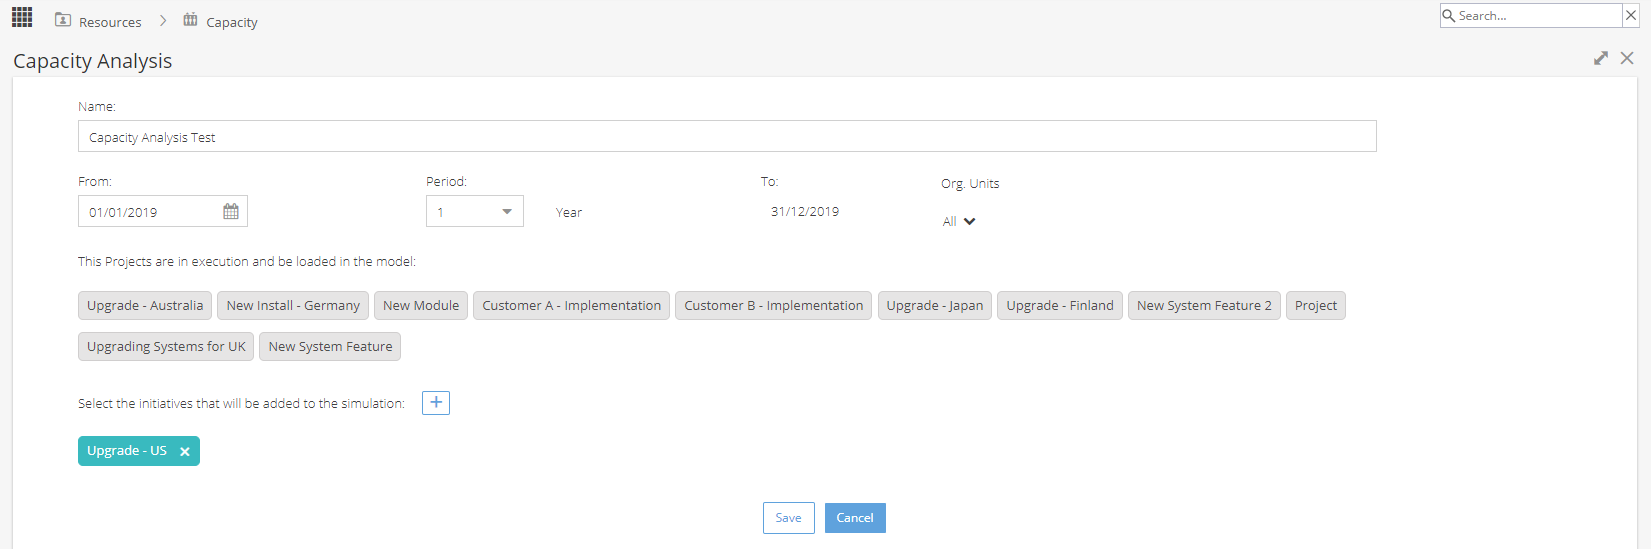
The system will take a few moments to build the model.
Click on to the model tile to view.
The model will show existing (Live) projects in grey.
Draft Projects (Initiatives) will have a blue bar.
The bottom half of the screen will show the utilisation / capacity of resources by profile.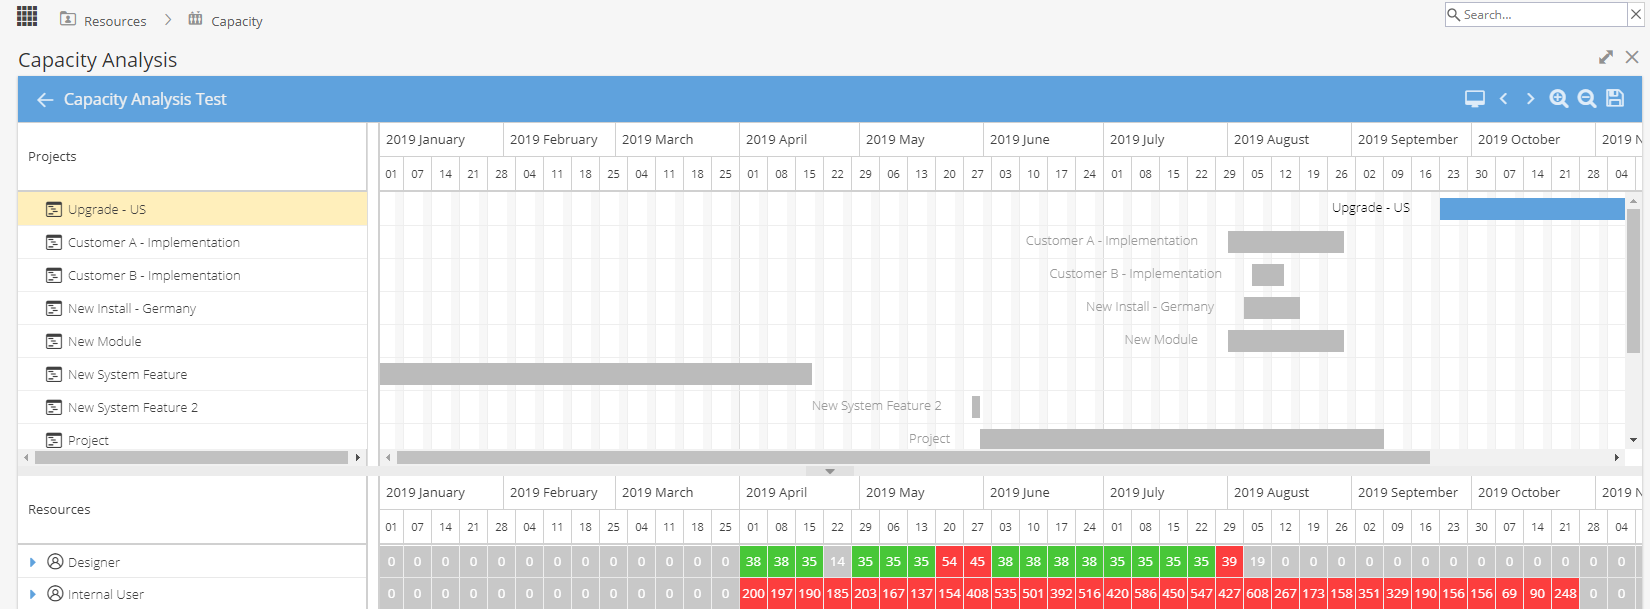
Click and drag a Draft Project to change the Start Date and see the impact on your Resources.
The icons on the top right of the screen allow you to:
 |
View Full Screen |
 |
Go Forward / Back |
 |
Zoom In / Out |
 |
Save the current model |
Use the arrow on the top left to return back to your list of models.
For existing models, you will have the option to view, deactivate or delete.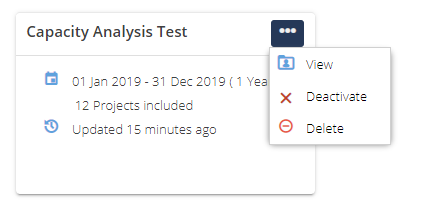
After a model has been created you can not make changes to the Projects included, you would need to create a new model.